Oh! so you are learning about Kubernetes, Welcome to the in depth blog about Pods in Kubernetes clear all your doubts here 😉
Pods
Pods ~ The basic building block of Kubernetes.
Kubernetes revolves around pods so it is required to understand pods to understand other topics as well.
What is Pod?
"Pod is atomic unit of scheduling in Kubernetes."
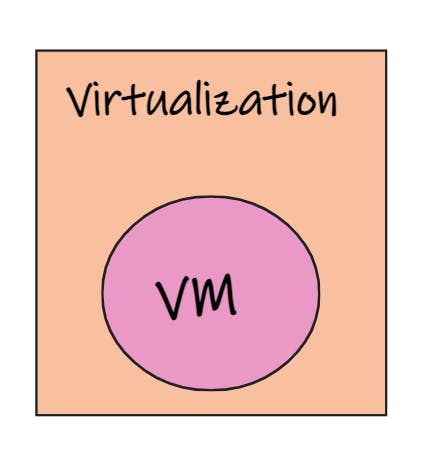
Like in virtualization the atomic unit of scheduling is VMs, If we want to deploy any app through virtualization we need to put our code and related config inside the virtual machine and then deploy it.
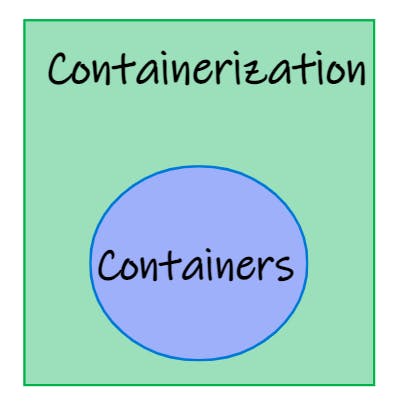
When it comes to Containerization the atomic unit is containers.
And in the same way we use pods in Kubernetes.
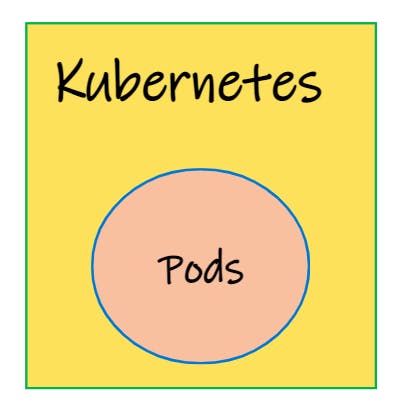
Virtual machines, containers and pods are different runtime environment using which we deploy our application.
Pod Deployment
To deploy the pod we generally write the pod manifest file which consists of container images that we are about to deploy and submit to the API server on the master node.
After that API server and scheduler components on master node decides and deploy these pods on appropriate worker nodes.
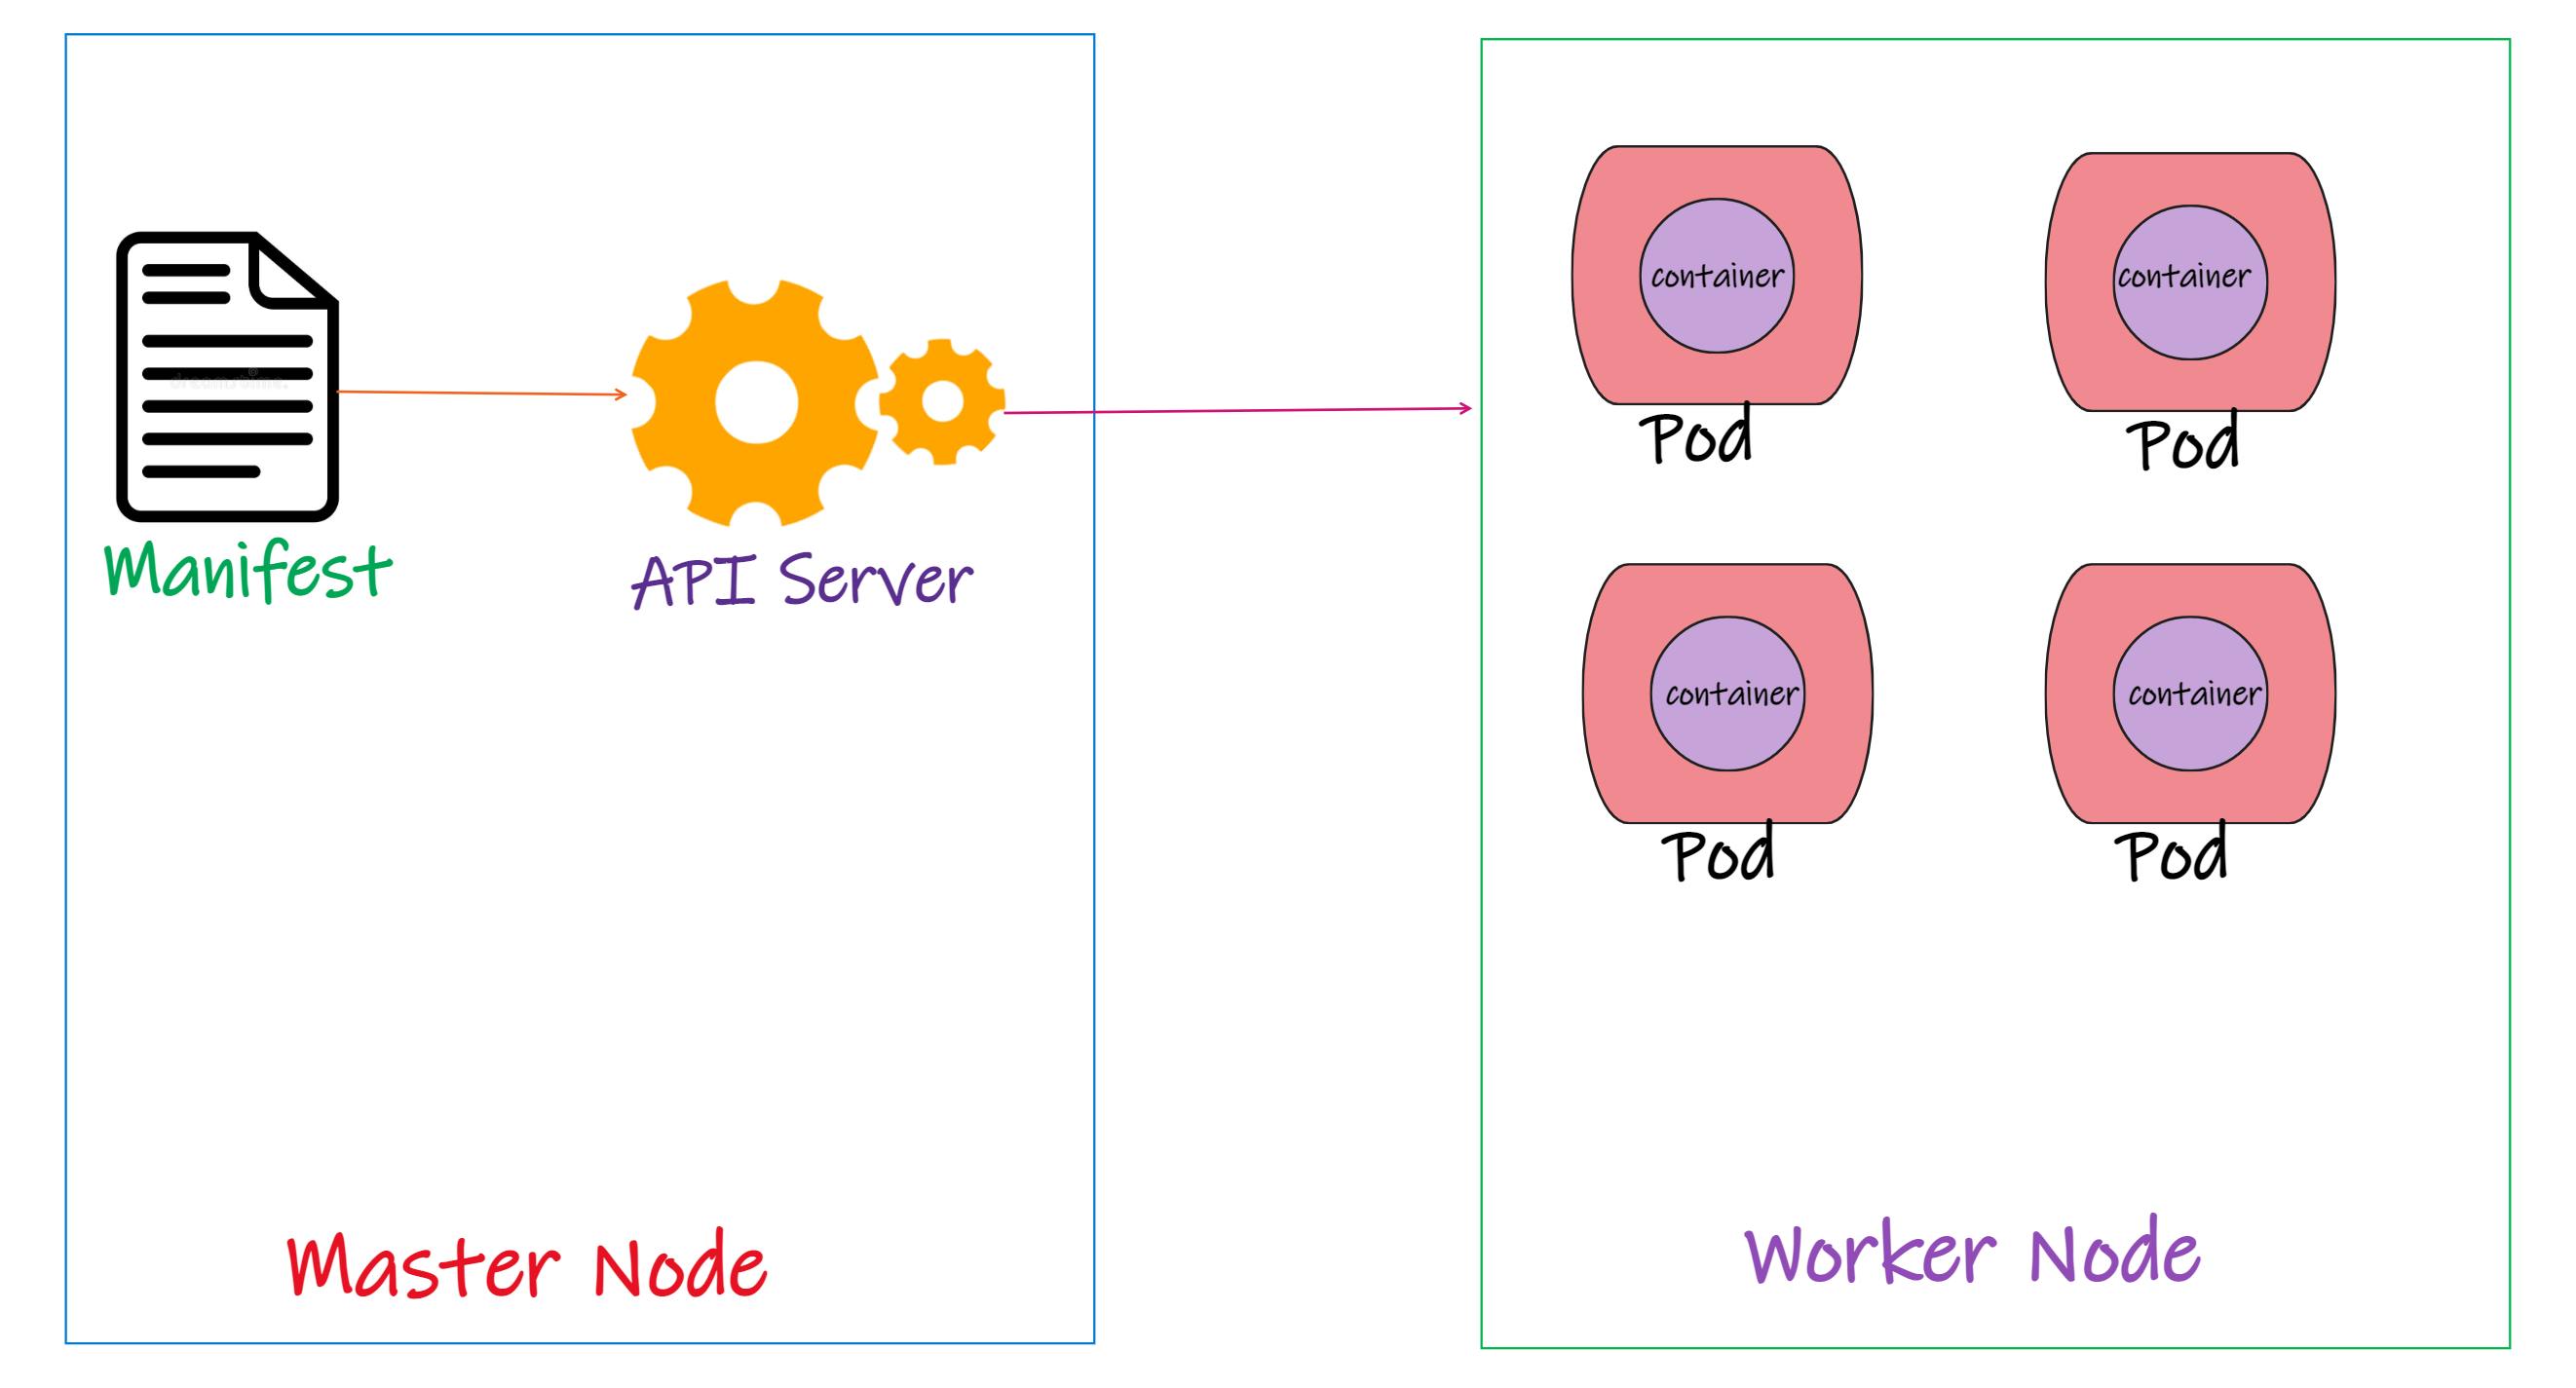
Generally our aim is to deploy our app in the form of Containers that are distributed across the set of worker nodes inside the Kubernetes cluster.
However Kubernetes does not deploy containers directly on the worker nodes instead containers are encapsulated inside pods.
Scaling the Pods
As the time passes, users accessing our web app increases, and then we need to scale our web app as the demand goes up.
Now we need to add additional instances of our web app to share the load. To do this we need to create new pod altogether with the same app instance.
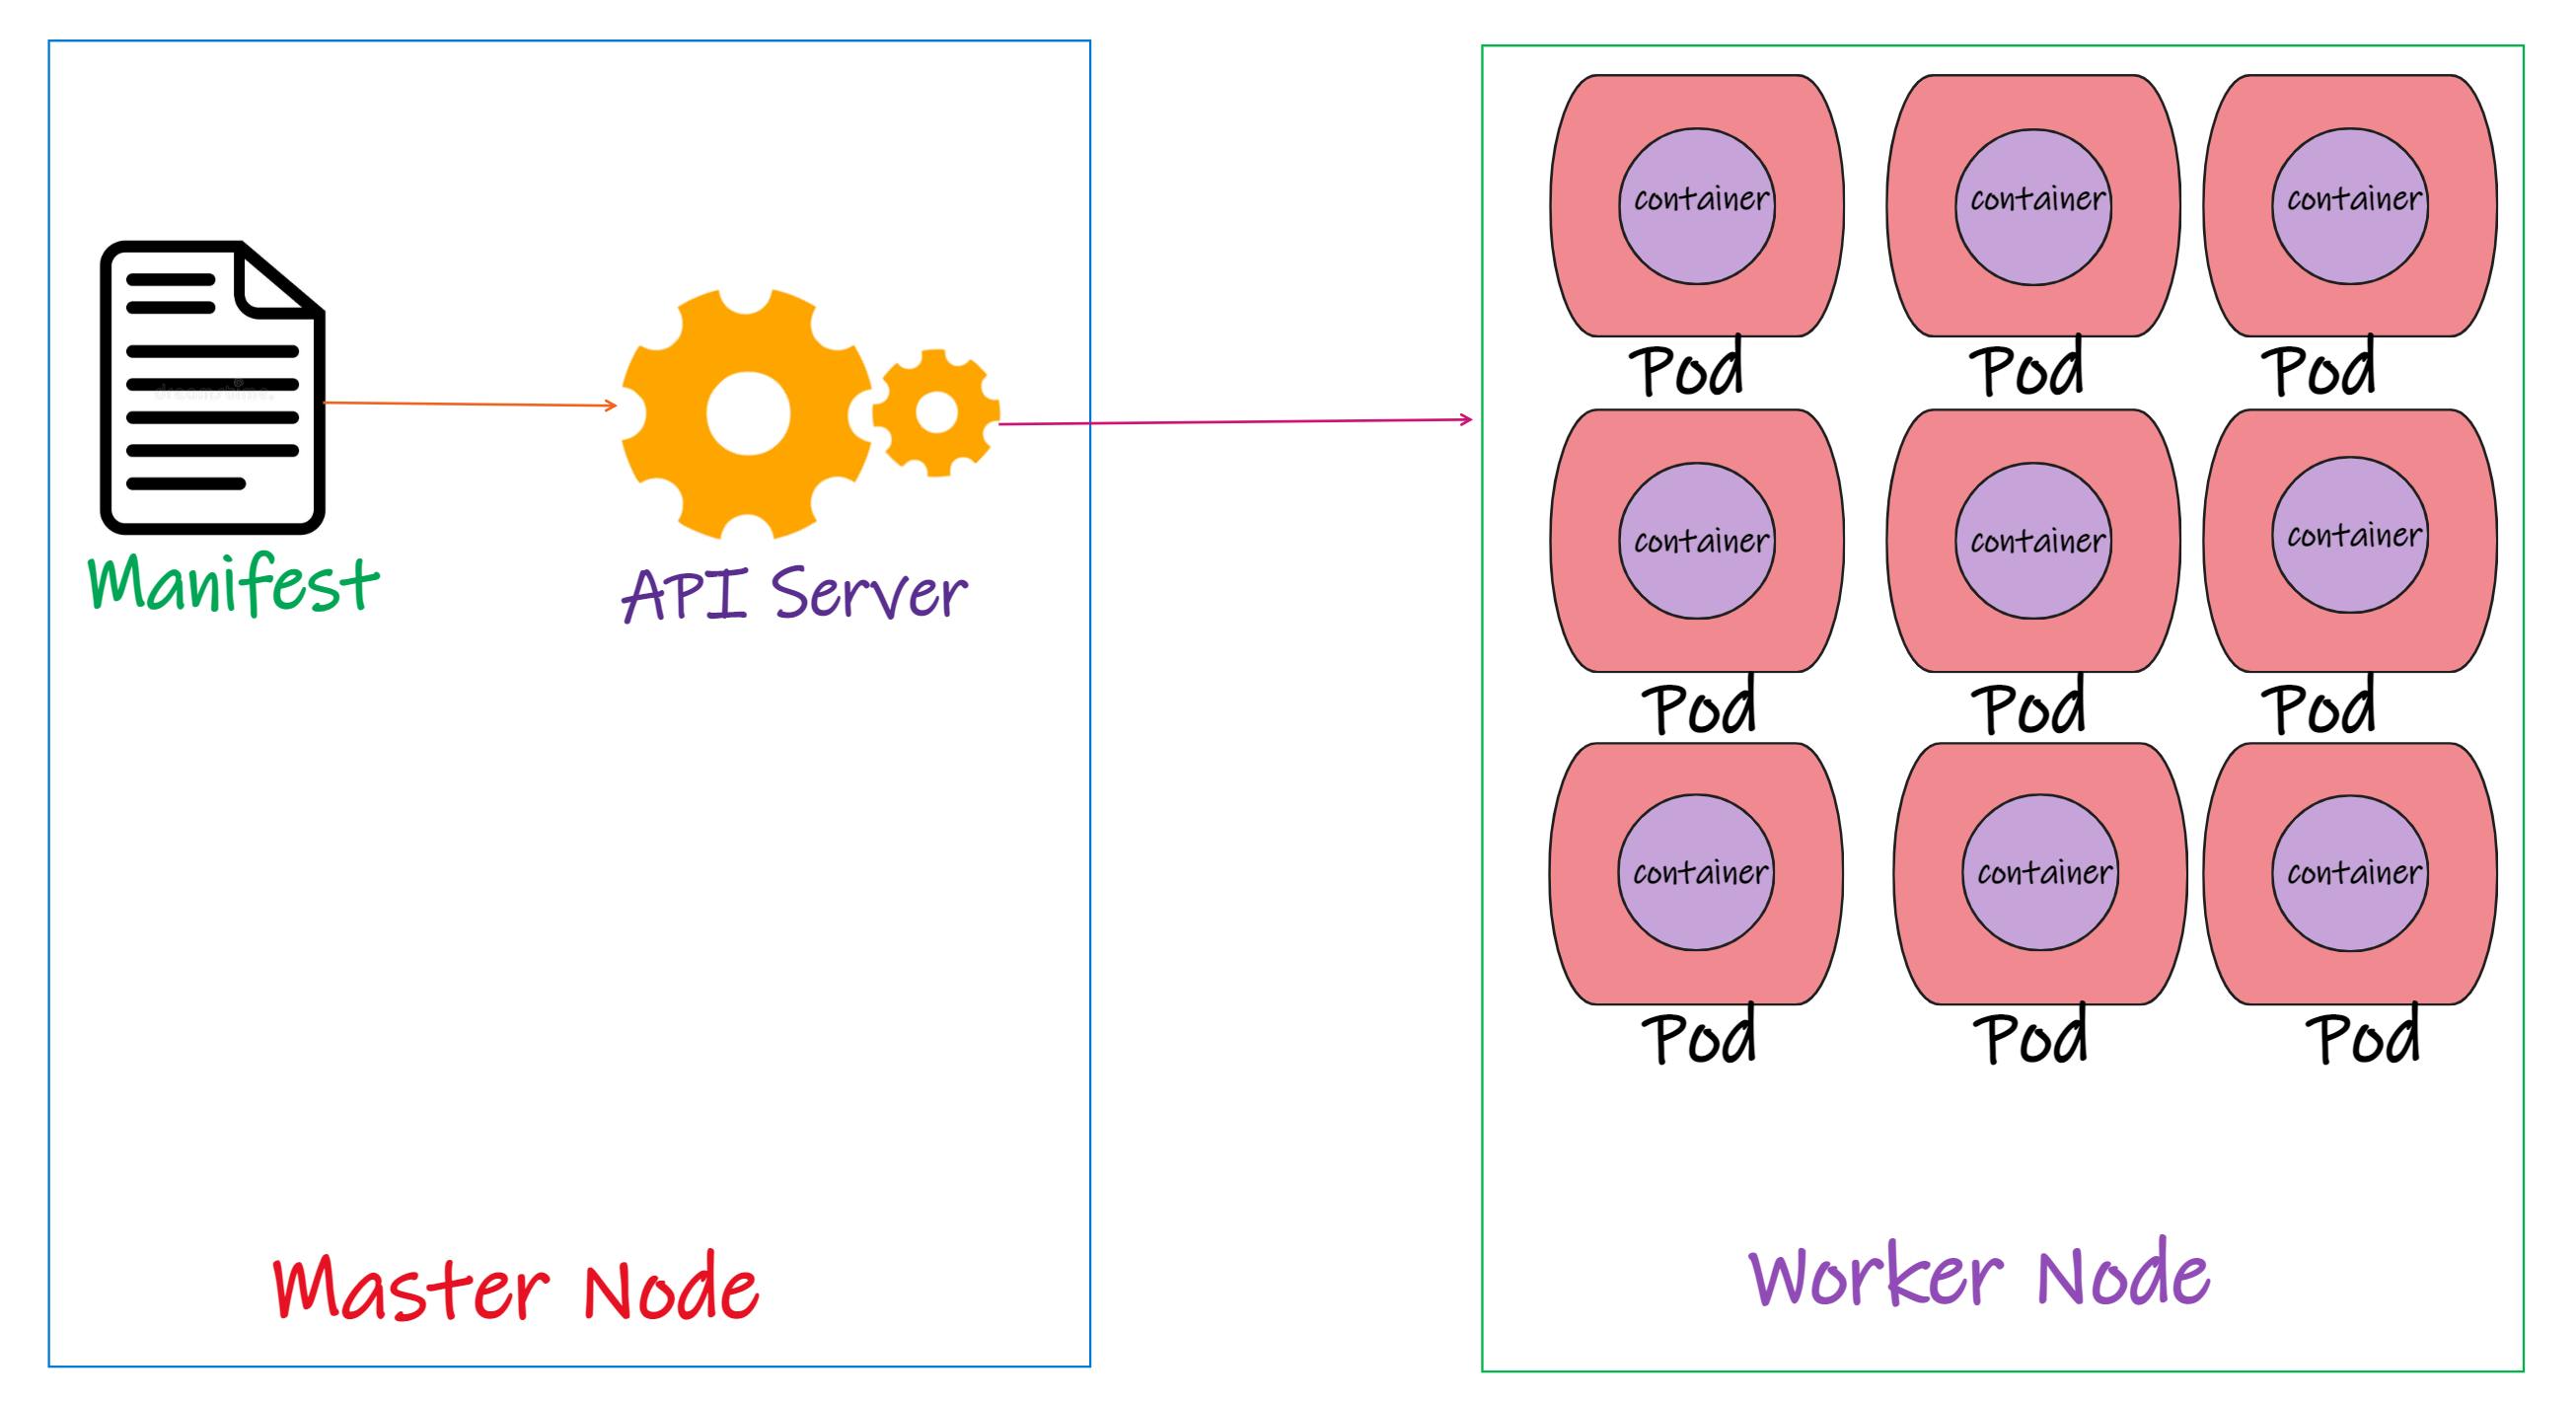
Now here is a question what if number of users further increases again and we do not have enough resources in worker node to create another pod? 🤔🤔
Then we have to spin up a new VM and join the new worker node to the cluster. Once it is ready Kubernetes will start deploying the pods into this new node.
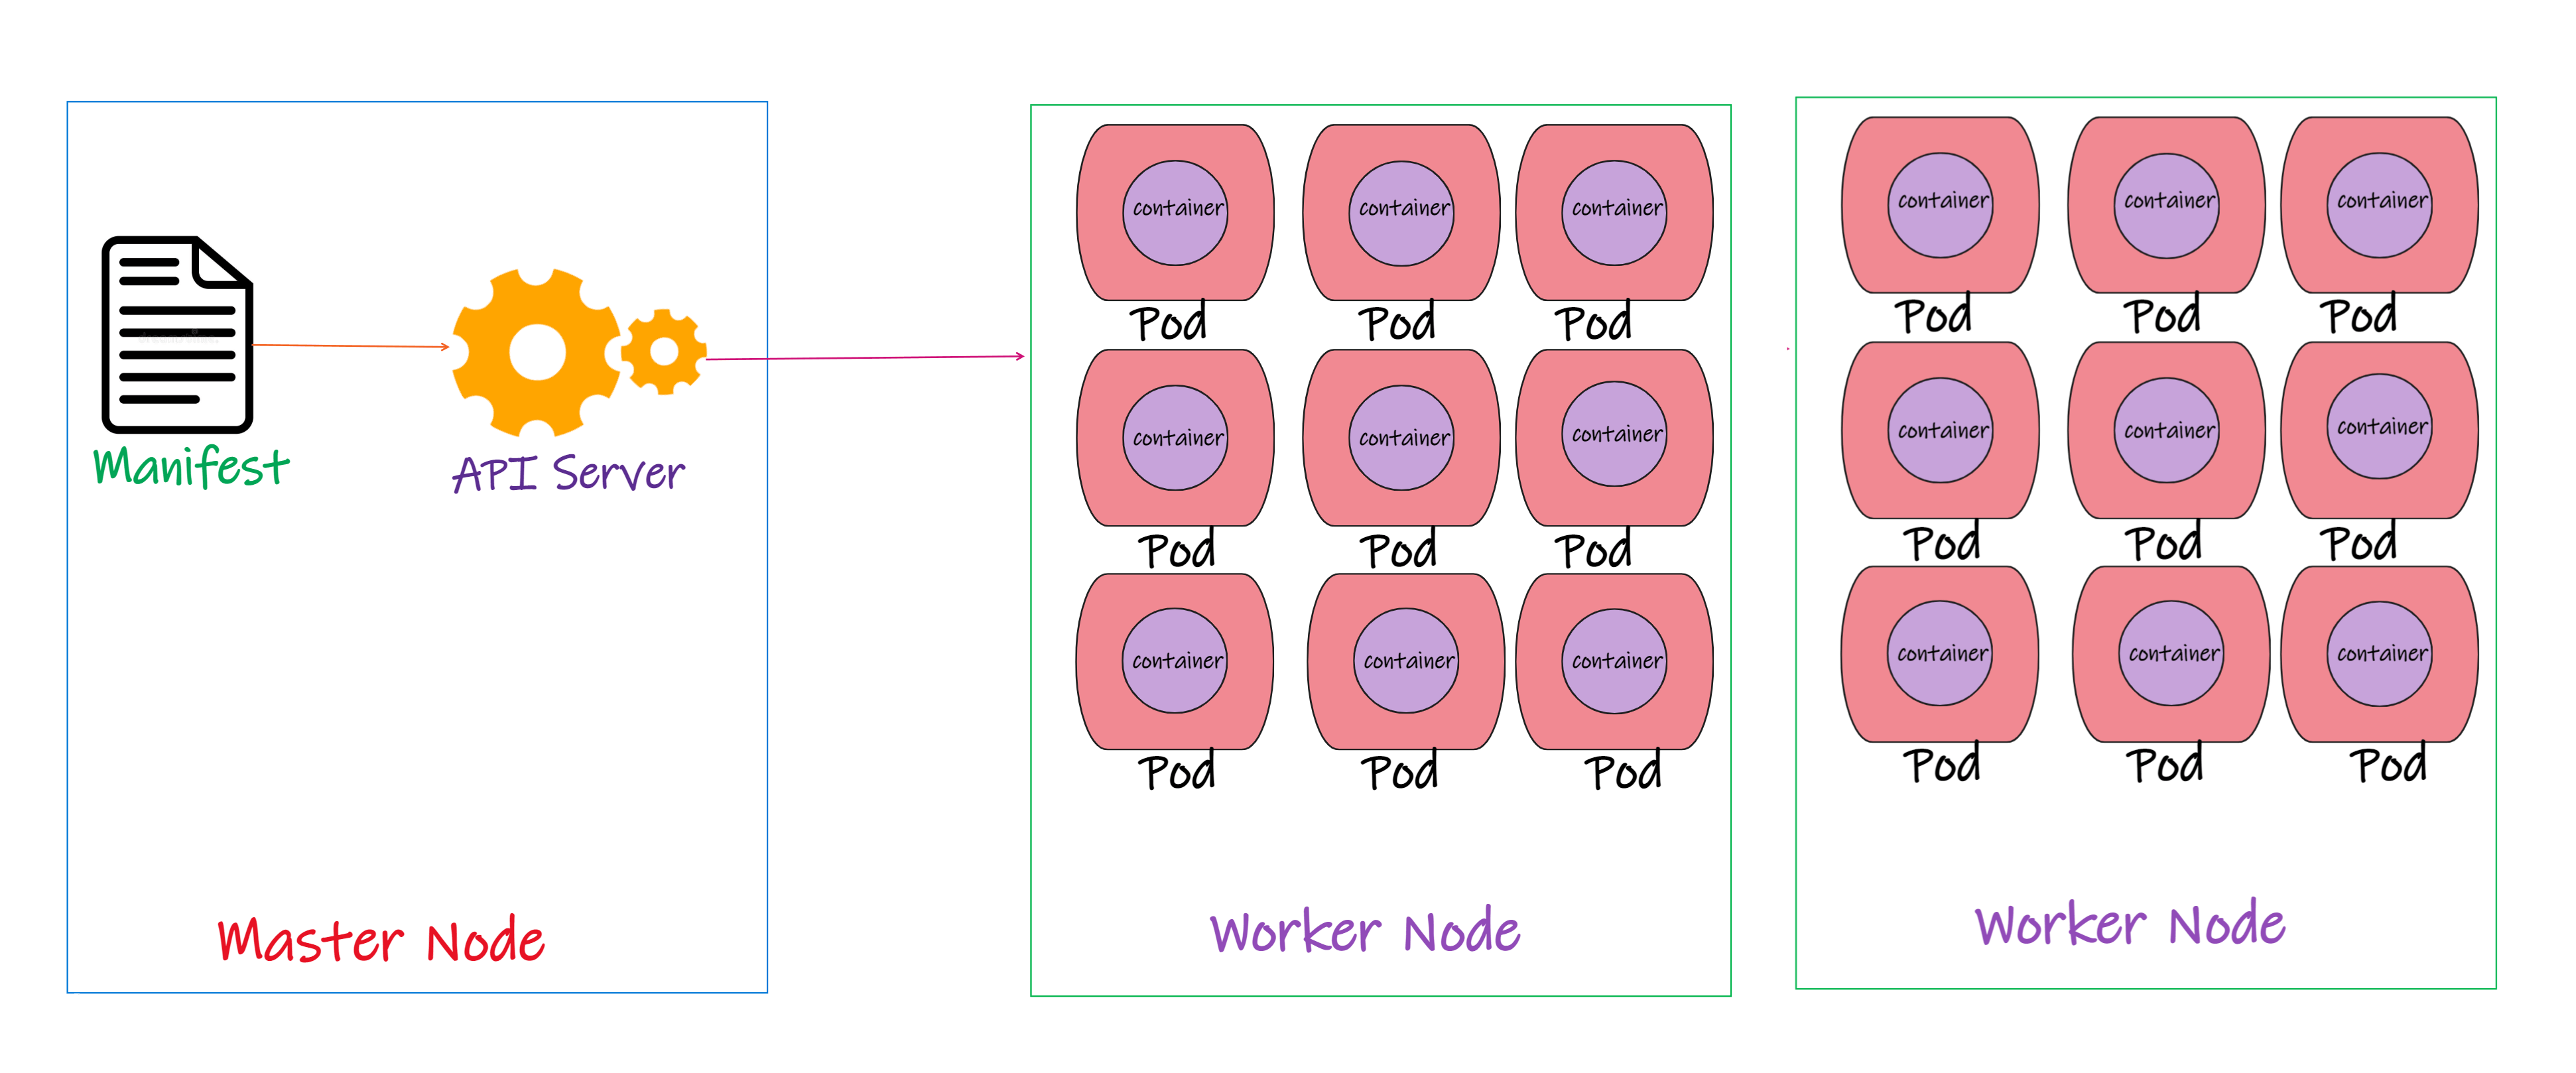
Points to Remember :-
- Typically there will be one container per pod
- To scale up our app we need to create more pod instances similarly to scale down we need to delete the pods.
- Kubernetes do not interact with containers directly.
Multi-container Pod
We talked about one container inside a pod and we know typically there will be only one container per pod. But it is possible to have two or more container per pod. which is a rare scenario. This is called as Multi-container pod
Sometime we will come across a scenario where we need a helper container that might be doing some kind of a supporting task for our main web app, such as processing a user entered data or processing a file uploaded by user or etc. And we want this helper container to live along the side of app container. So in this case we can have both the container part of same pod so that when a new app container is created the helper container is also created. And in the same case when the app container dies helper container also dies because they are the part of same pod.
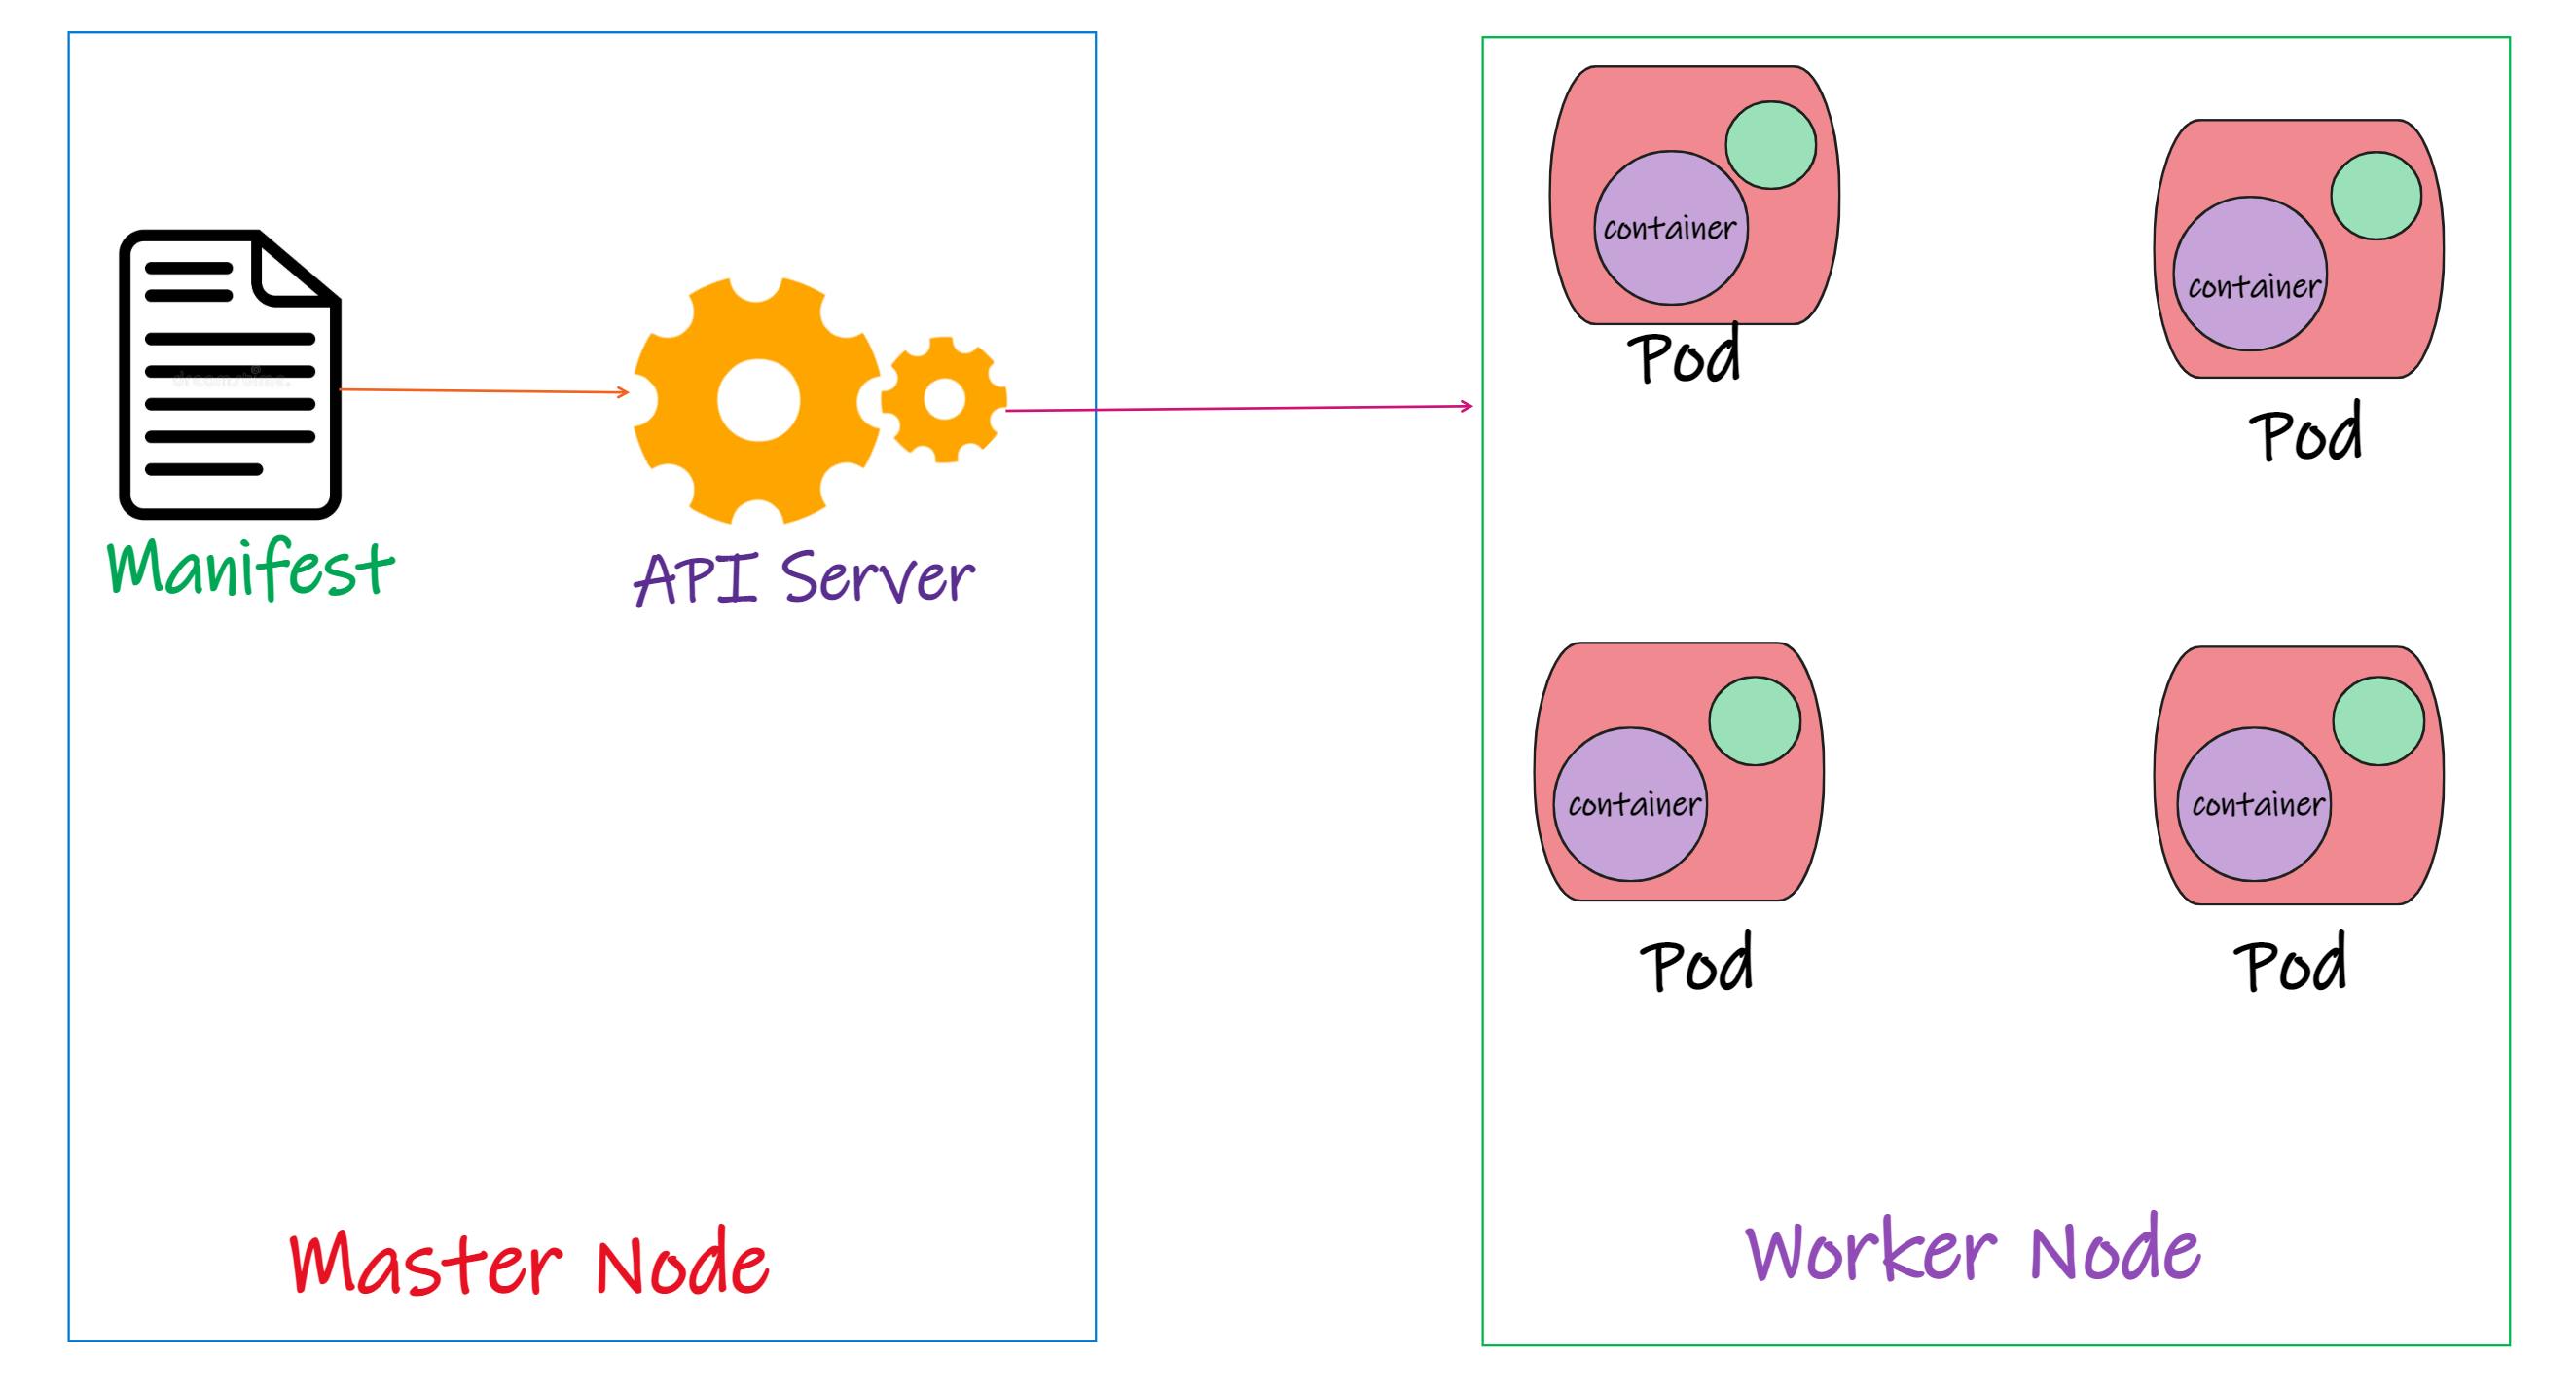
So these two containers can communicate with each other directly by referencing using localhost. because the share the same network namespace and they can also easily share the storage space. However multi container pods are very rare use case.
Pod Networking
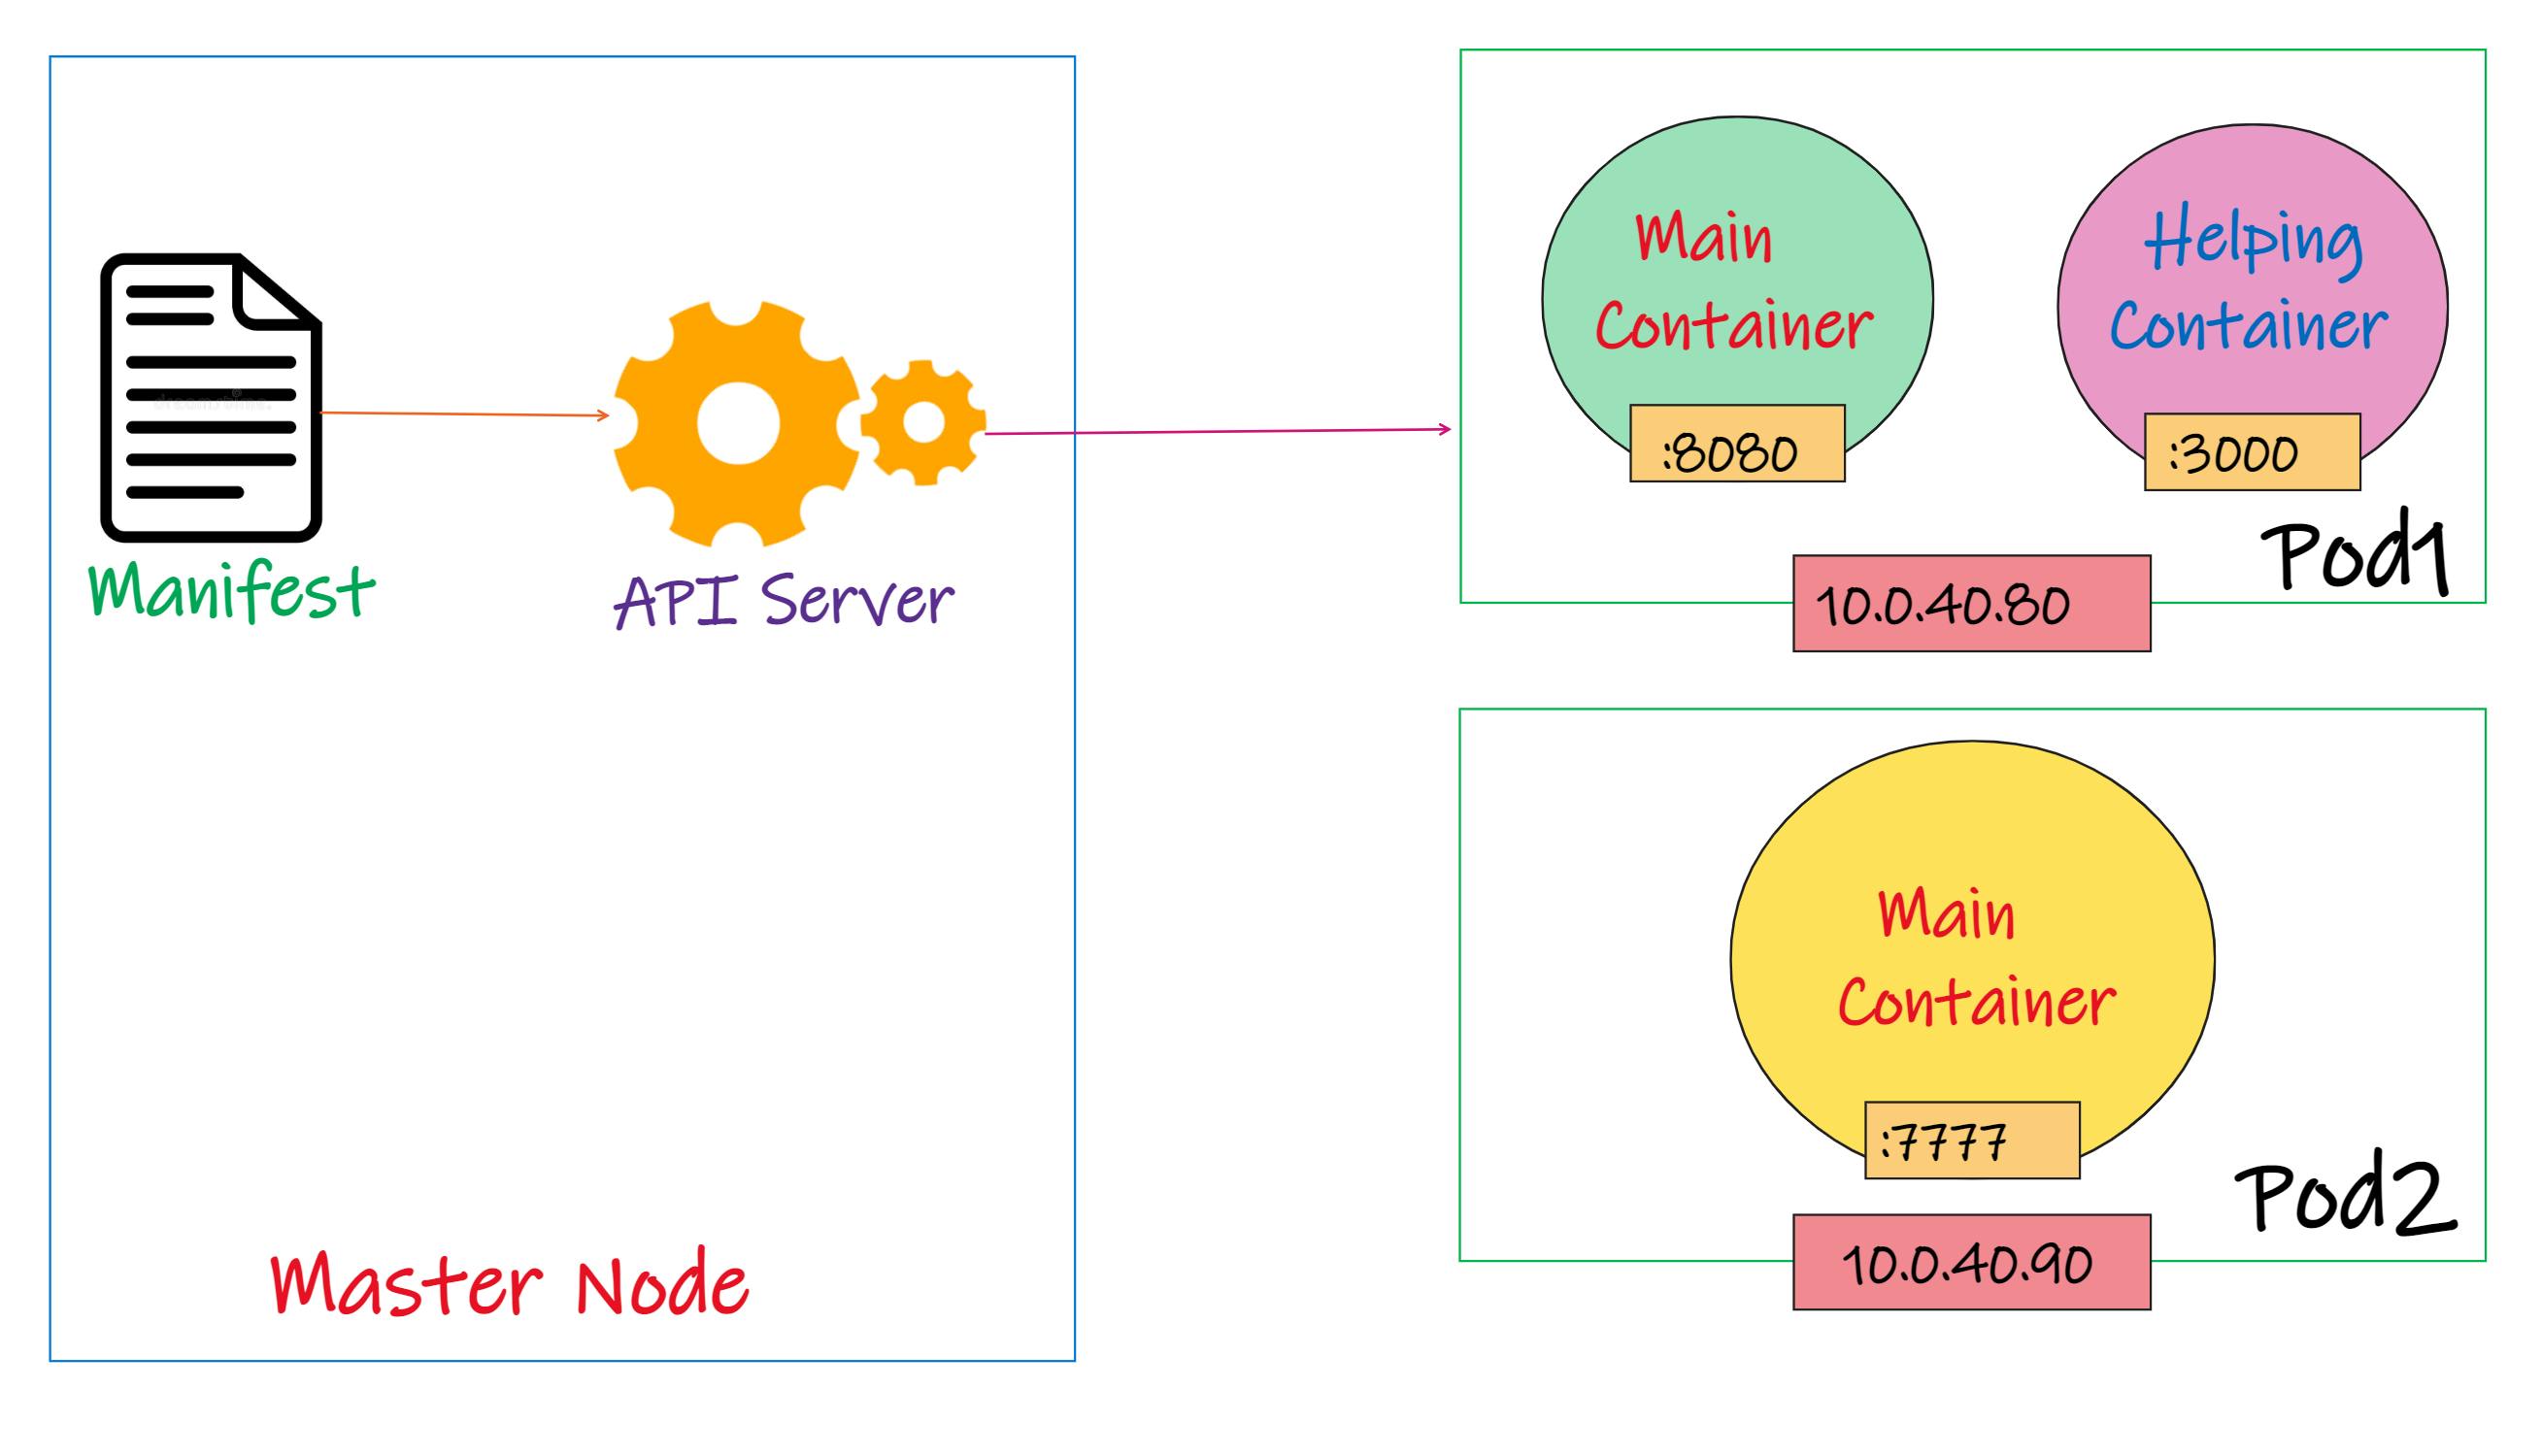
As we can see in the diagram we are having two pods Pod1 and Pod2 which is running on worker node inside the cluster. Pod1 has two containers and Pod2 has just one containers
If we observe this diagram we notice something new in this diagram that is Pod IP address. Every node inside the cluster have it's unique IP address which is called as node IP address. But in Kubernetes we have additional IP address called Pod IP address.
Once we deploy the pod on to the worker node inside the Kubernetes cluster It will get it's own IP address. So every pod inside Kubernetes cluster has it's unique Ip address per pod.
So if we look above on the diagram we see that we got two pods and two Ip addresses, One IP per Pod.
How these containers inside the pod communicate with outside world? 🤔🤔
There is something called as network namespace. All these containers inside the pod operate within that same network namespace as a pod which means every containers inside he pod will have same Ip address.
But there should be one distinct thing which make the unique way to identify each of these container 🤔🤔.
And that's where the Ports comes in. As you can see in the above diagram that the main container in the pod has a port 8080 so it can be accessed using the Pod IP and Port number 8080. similarly helper container in Pod one can be accessed using the same Ip but with port 3000.
To access the container inside Pod2 we use Pod2 IP address and port number of the container.
That's how we access the applications deployed inside the Pods containers and port are accessed from outside world in Kubernetes
Inter-Pod communication
In Kubernetes, each Pod has its own IP address. At a very primitive level, Pods can communicate with each other using their IP address.
This means that whenever we need to address another Pod, we can do it directly, using its IP address. This gives Pods similar characteristics to virtual machines (VMs), where each Pod has its own IP address, can expose ports, and address other VMs on the network by IP address and port.
Even if a Pod has more than one container, it still has just one IP address. You can see this shown in the picture above.
How does a frontend pod communicate with a backend pod?
In a typical web application architecture, we might have a frontend application which talks to a backend. The backend could be something like an API or a database. In Kubernetes, we would realise this as two Pods, one for the frontend, one for the backend.
We could configure the front-end to talk to the backend directly by its IP address. But the frontend would need to keep track of the backend’s IP address, which can be tricky, because the IP address changes as the Pod is restarted or moved onto a different Node. So, to make our solution less brittle, we link the two applications using a Service.
We will learn about services later. so don't worry if you don't know what a service is in Kubernetes.
Pod Lifecycle
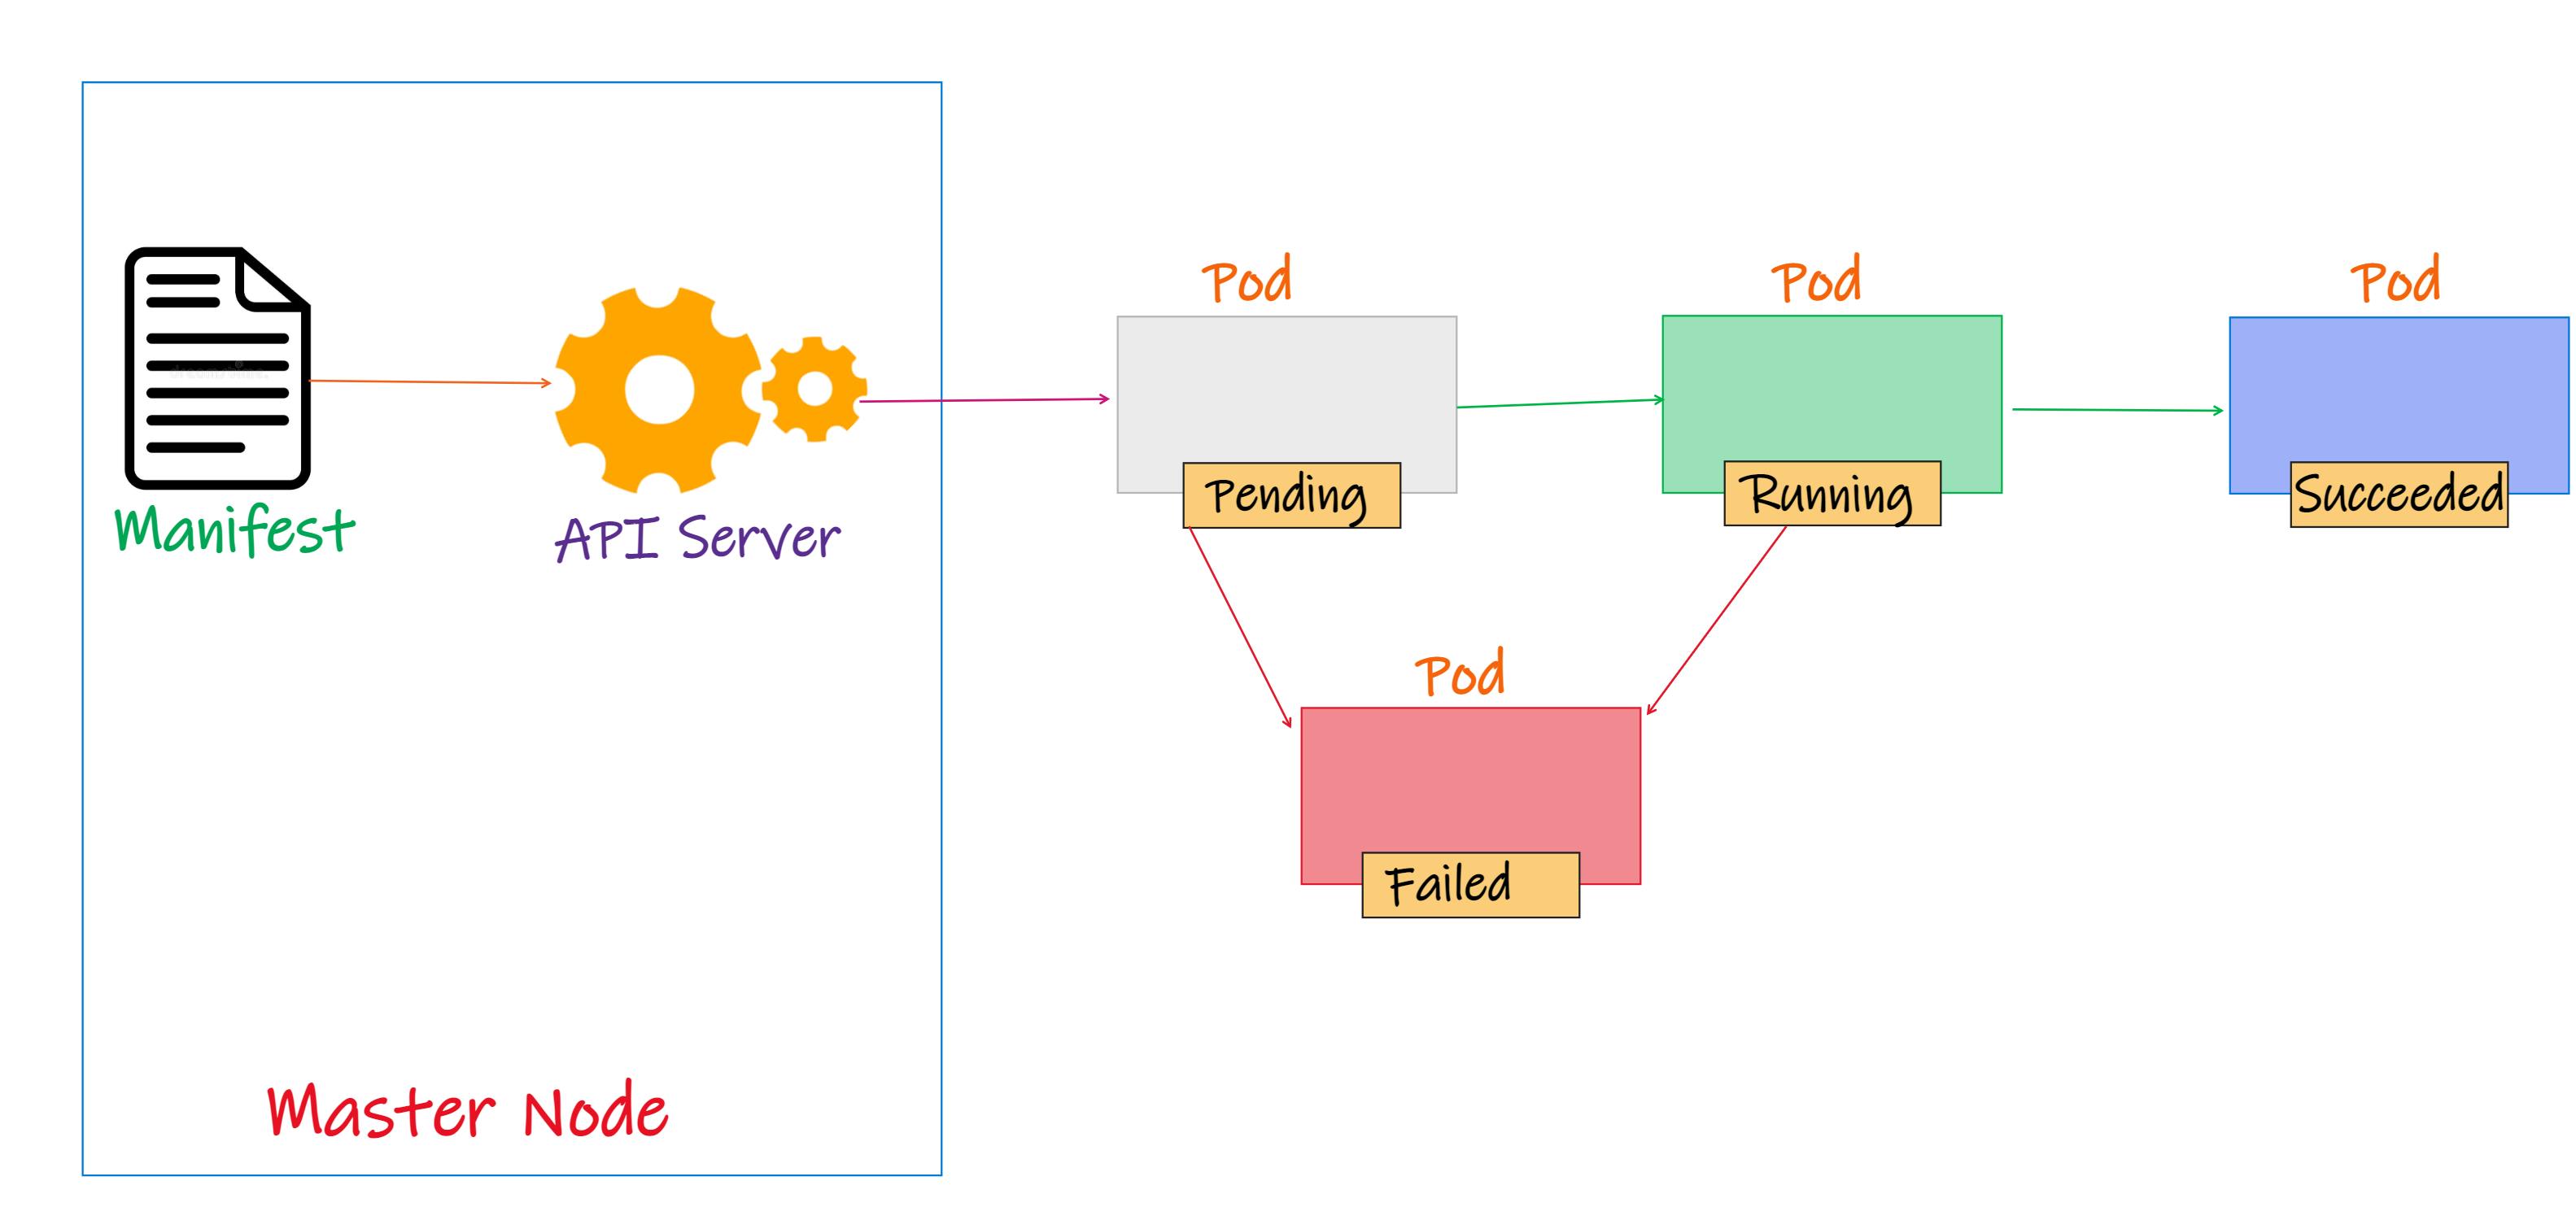
- First we define the pod configuration inside a manifest file in YAML or JSON format (mostly we use YAML format)
- Then we submit the manifest file in the API server on Kubernetes master. then it will scheduled on the worker node.
- Then pod goes to pending stat, during this pending state node will download all the container images and start the containers.
- Pod stays in pending state until all containers are up and running and pod moves to Running state
- In Running state the main purpose of the pod is achieved, then it's get shutdown and the state changes to succeeded.
- There is one more stage when the pod gets in Failed state that happens when pod is in pending state if for any unknown reason if pod does not start then it moves to failed state
When pod dies it dies. we can't bring the same pod power back, If pod dies we have to replace it with the new pod with exactly same config but different ID, different IP etc.
Pod Configuration (Manifest file)
We can define manifest file in YAML as well as JSON format In this blog I am going to use YAML format because it is easy then JSON and human readable.
Most of the Kubernetes Object consists of four top level required fields. So even in the pod manifest file it consists of same for top level fields They are:-
- apiVersion :- apiVersion defines the version number which this Kubernetes object belongs to. There are many objects in Kubernetes so if we want to know the apiVersion of any object we can use command
kubectl api-resourcesThis command gives us some information about object which also include apiVersion.
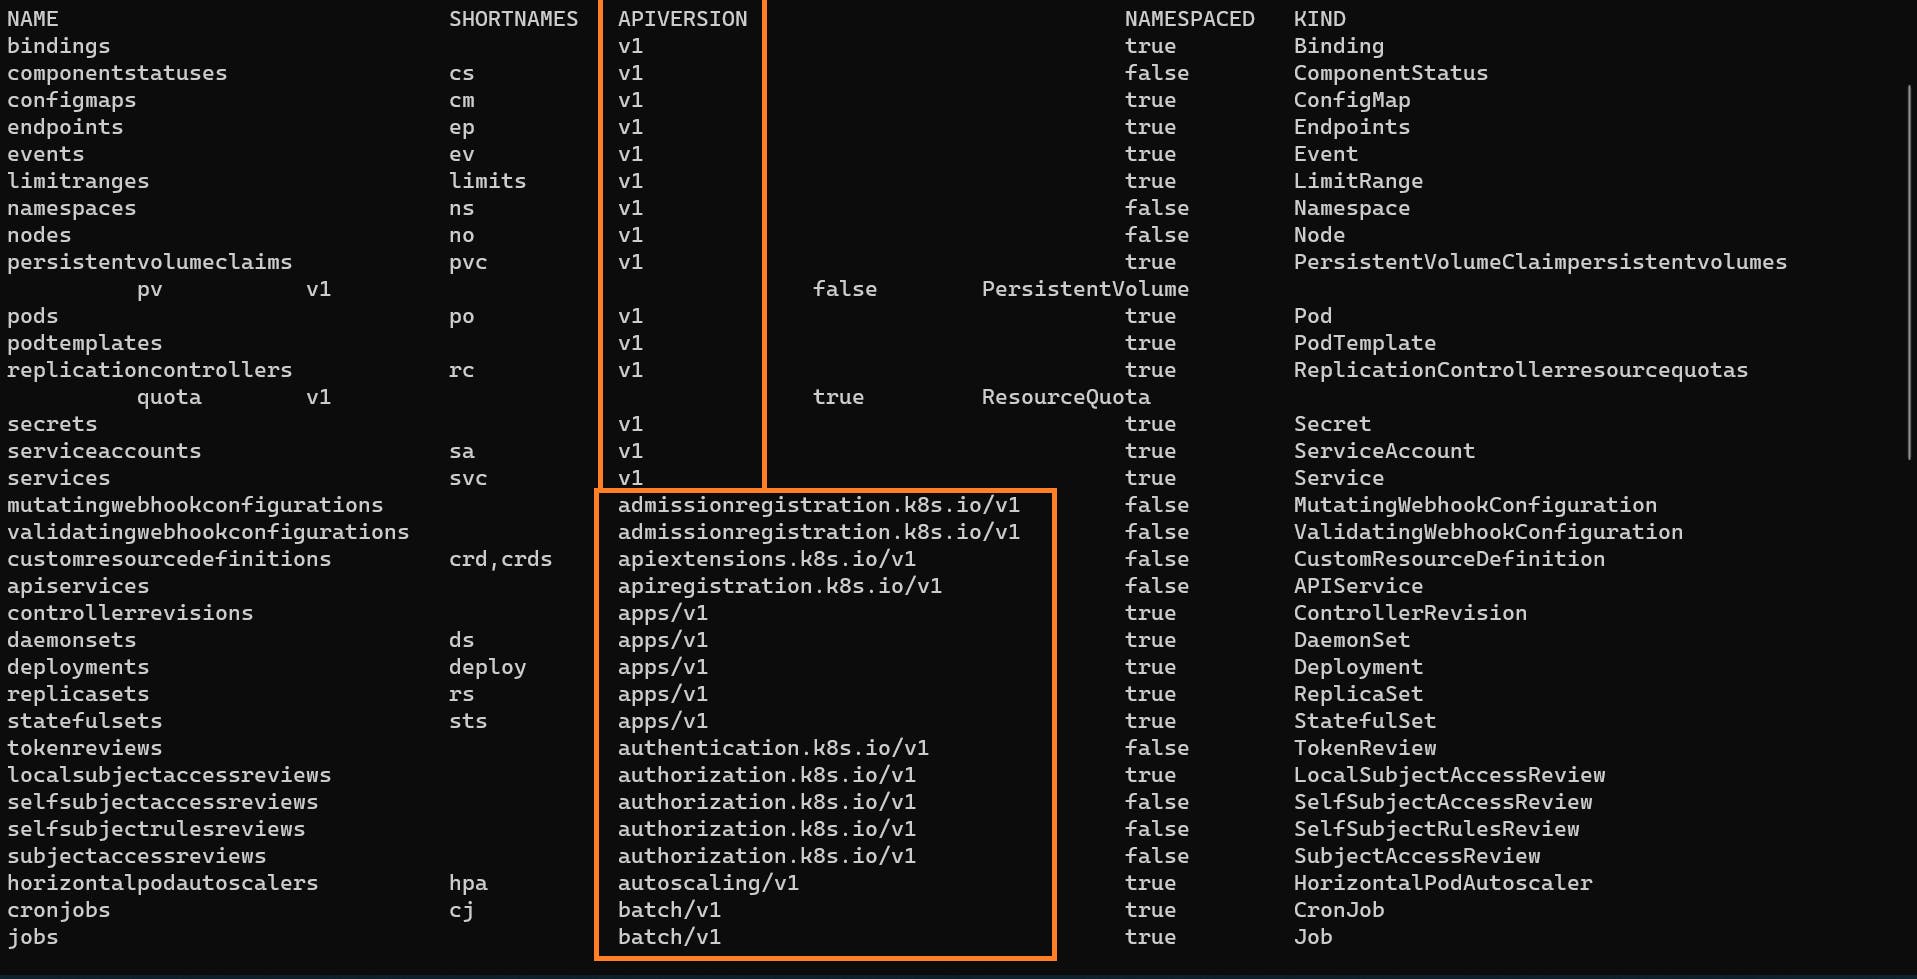 So the apiVersion of Pod is v1
- kind :- Kind defines which object we want to create like Pod, Service, ReplicaSet, Deployment etc.
- metadata :- metadata section consists of two things one is name and other is label, name is the name of object which we are creating it can be any name of our choice. and label is just a tag give to the object. This labels comes very handy when it come to filtering. Assume there are 1000s of pods running in our cluster and now we want to filter all the pods which are related to nginx, Then labels come very handy in those situations. However label is an optional field, But I recommend to use label always.
- spec :- Pod is nothing but a wrapper around one or more containers and spec contains container configuration. we can define here name, image, environment variables,and commands to run ton container also.
Now let's see an example of creating a pod with nginx container.
Pod's Hands-on
apiVersion: v1
kind: Pod
metadata:
  name: nginx-pod
  labels:
    app: nginx
    tier: dev
spec:
  containers:
  - name: nginx-container
    image: nginx
The name of the file can be any thing with extension yaml or yml
Now let's deploy this pod configuration.
Create The Pod
To create the pod we can use kubectl command line tool for Kubernetes with the yaml file name
Command :- kubectl create -f nginx-pod.yml

Get all the pods in our cluster
To display all the pods in our cluster we can use
Command :- kubectl get pods

Wide output with pods
As we know every pod has unique IP address, so to know the IP address of pod and node in which pod is running we can print the wide output using
Command :- kubectl get pod -o wide

Pod config in YAML format
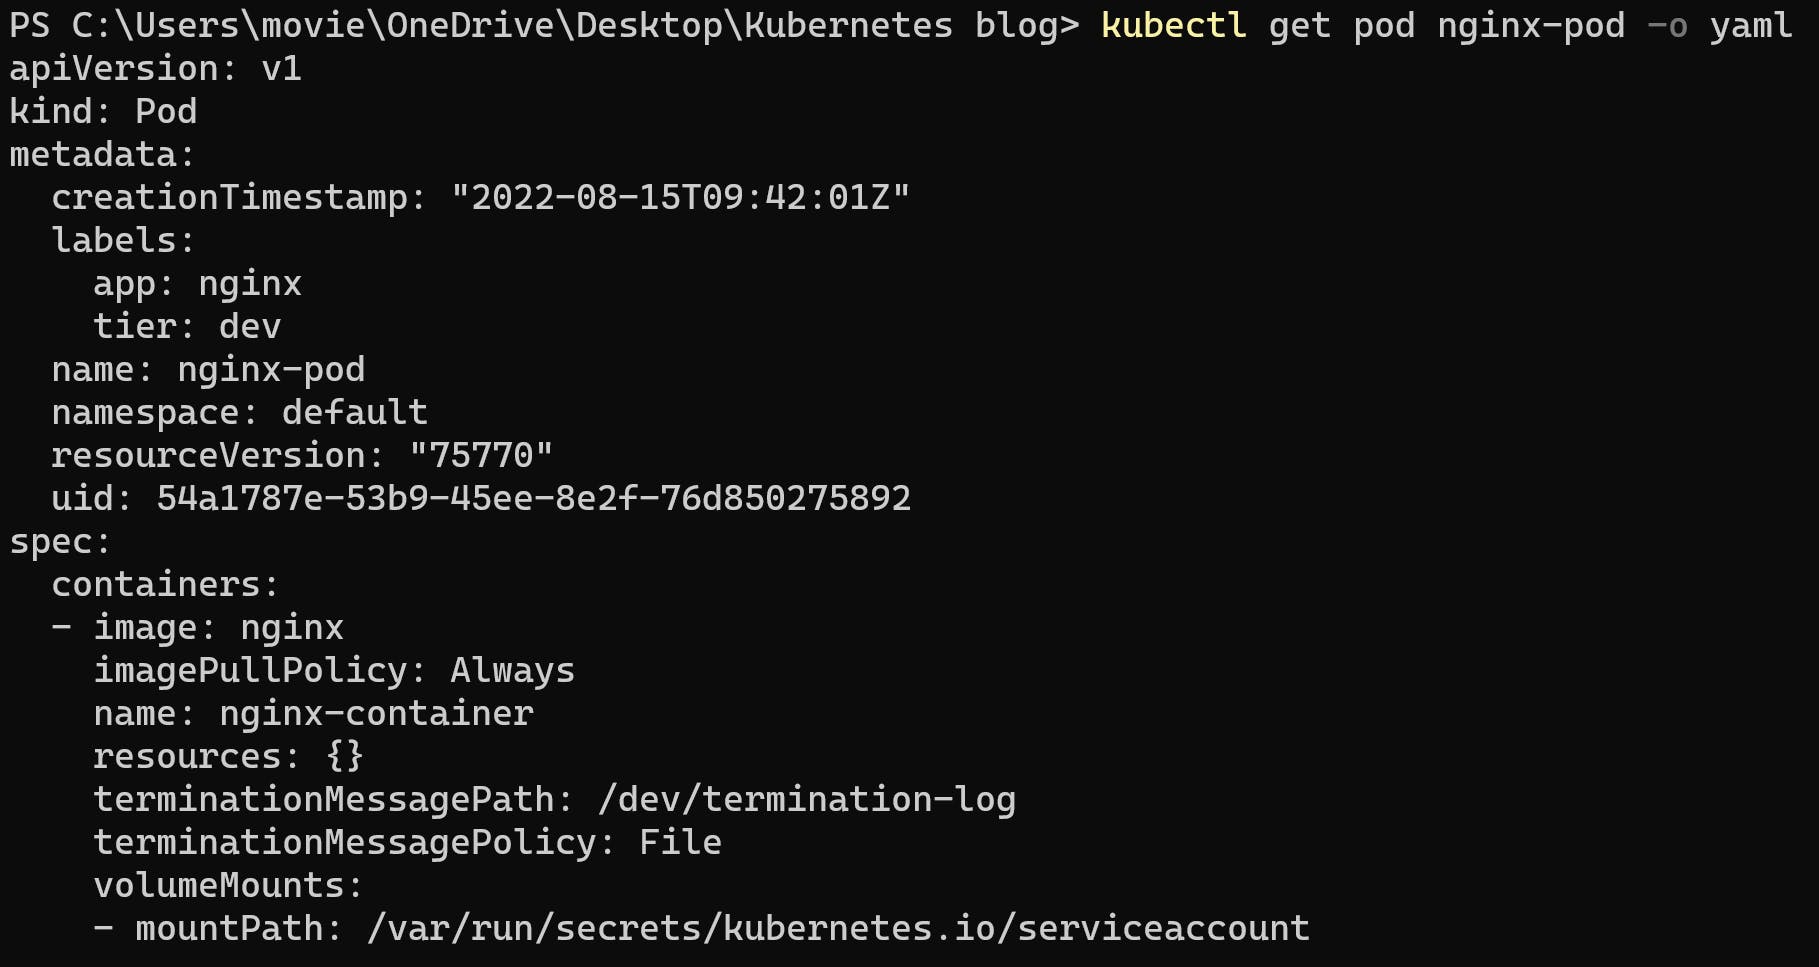
We can print our pod configuration in yaml format
Command :- kubectl get pod nginx-pod -o yaml
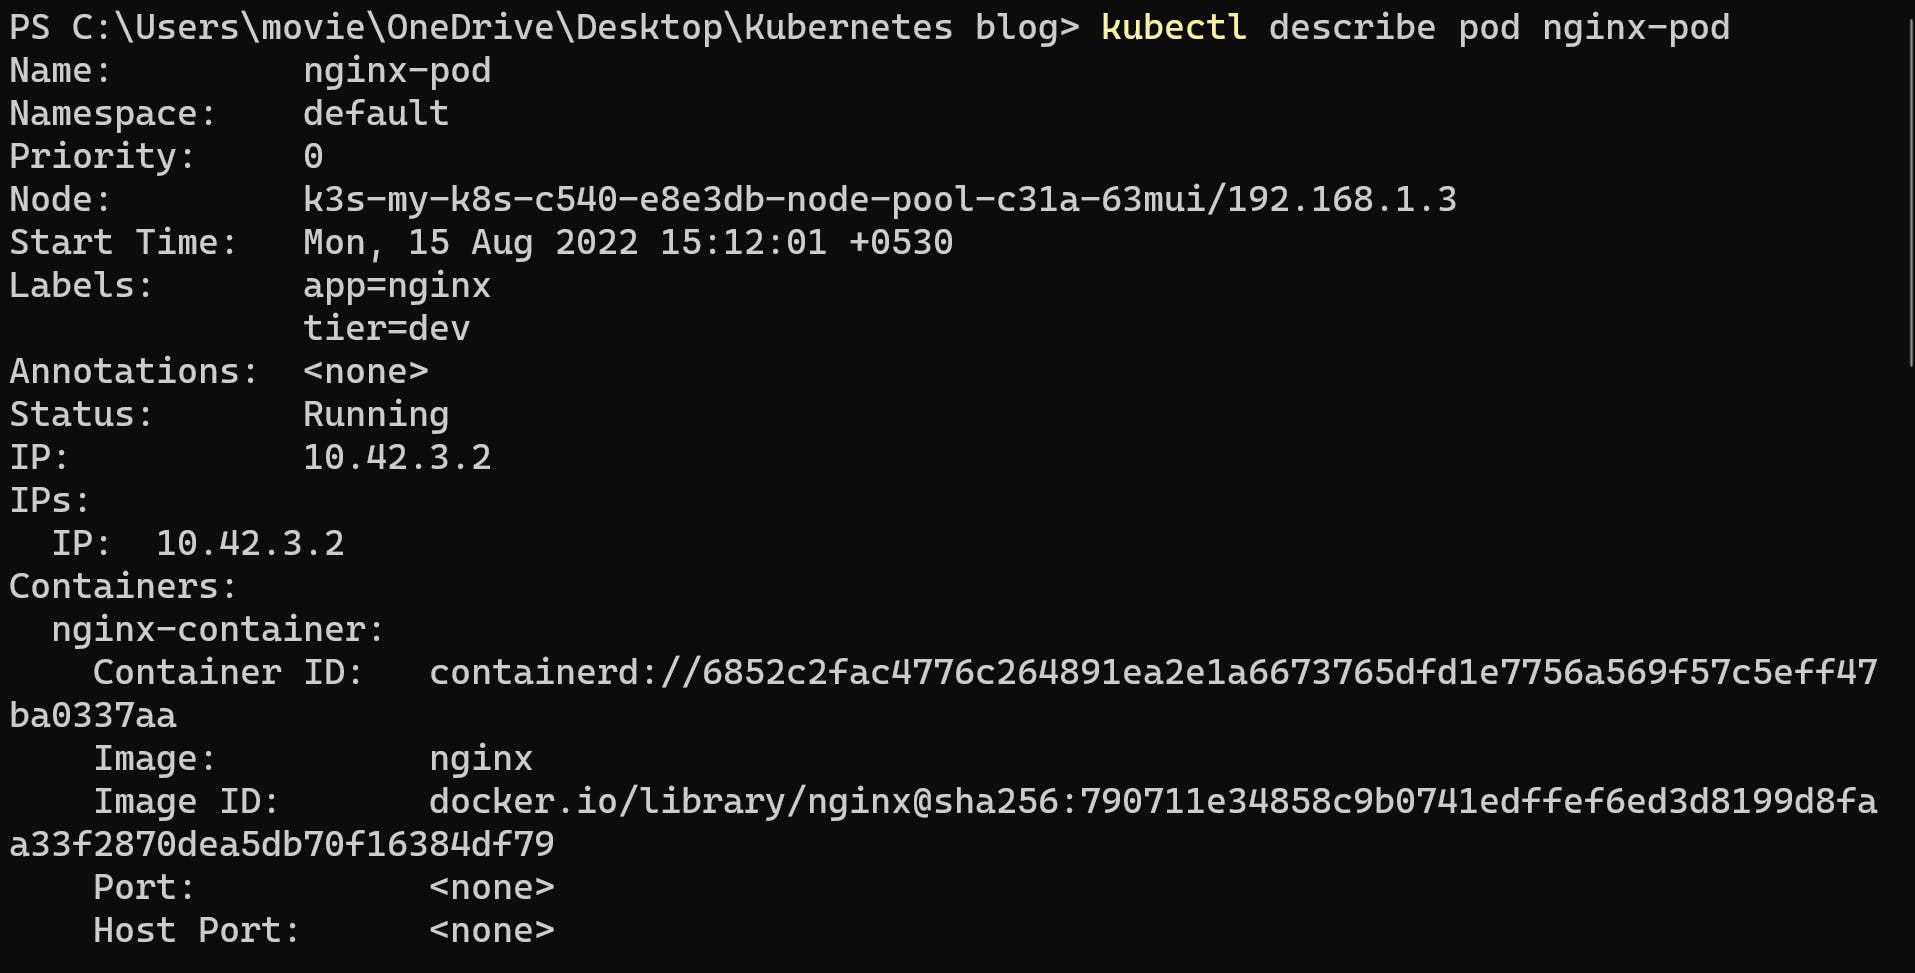
Display all the details of pod (describe)
we can get all the details of the pod which includes a list of all events from the time pod is assigned to the node till the current status of the pod.
Command :- kubectl describe pod nginx-pod

Get inside the pod and exit
We can get inside the pod using
Command :- kubectl exec -it nginx-pod -- /bin/bash
To exit from the pod we can use exit

Delete the Pod
We can delete the pod by two ways using manifest file and with pod name
Command to delete with pod name :- kubectl delete pod nginx-pod

Command to delete with manifest file :- kubectl delete -f nginx-pod.yml
